Showing posts with label Tutorials. Show all posts

Wednesday, September 11, 2013

Some Summer Bee Blocks

Cross or Plus block made with black and white fabrics for the cross.  We were told we could make the cross part any size and any location within the block.

These blocks are called a digital pinwheel block and were inspired by one of the quilts in Amy Ellis' book Modern Neutrals.

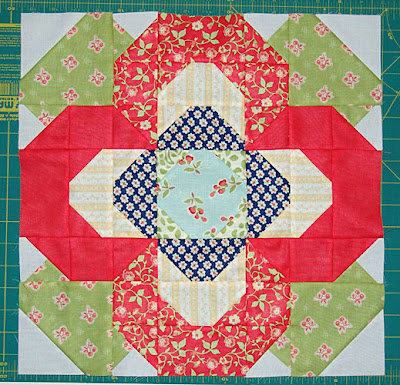
This flower block was from a tutorial from the bee member's blog.  You have to pay attention to what you're doing, but the end result is lovely!

I'm sure you've seen these Japanese + and X blocks popping up all over the internet.  This one is the 7.5 inch one made using the Badskirt Amy tutorial.

A pinwheel block made using the Sew Mama Sew tutorial.

This block was called Ring-Toss and I used the tutorial on Woodland Cottage Designs.

Some Summer Bee BlocksSocialTwist Tell-a-Friend

Sunday, May 12, 2013

The GBSB Sew Along Challenge 1 A-line Skirt, Part 2 Fitting

Wait!  What?  You're not shaped like a fit model with an exact ten inch difference between waist and hip?  Me neither.

The whole reason for a sew along is to make something usable, so unless you are built like the fit model used by the pattern company...deep breath...you're going to have to adjust the pattern to fit your real life body (or whomever you're making the skirt for).  Now, before you start weeping and wailing over the thought of trying to fiddle with a pattern that was obviously made for some industry ideal shape (which, by the way, is so not realistic for most women), let me assure you that a skirt is one of the easiest things to fit----really!

So, big deep breath...and exhale.  Better?  Good.  Let's get started.  I'm going to show you the basics of how I fit a skirt.  But, if you need more help, better instructions, or just want a more indepth fitting reference, I can recommend the books Fit for Real People by Pati Palmer and Marta Alto, Pattern Fitting with Confidence (used to be Fitting Finesse, I think) by Nancy Zieman, and The Complete Photo Guide to Perfect Fitting by Sarah Veblen.  I've had classes from Marta and Sarah and both are very knowledgeable on this which totally shows in the books.  I've also enrolled in Craftsy's Sew the Perfect Fit class with Lynda Maynard, which so far is quite good.  There are also fitting classes on Pattern Review from time to time, although no skirt ones at the moment.

Choosing a Size

I think this part stumps many people, especially those just starting into sewing clothes.  Pattern sizes do not coorelate to ready-to-wear sizes.  For skirts, I fit into size 6 at most stores (we all know how varied sizing can be between brands), but in patterns I usually range around a 14 depending on the company and cut of the design.  Huge difference!  So first thing to do, toss out of your head any preconceived ideas of what "size" you should be.  You are the size you are, the only reason we care at all is to know how to cut our fabric. 

This pattern gives two sets of measurements--one for your measurements (to choose a size from) and one for the finished measurements of the garment (so you'll know how loose the clothing fits).

To choose a size for skirts, ignore all that fluff about bust measurements, not needed here, go straight to the waist and hip measurements.  Remembering that this is just a starting point, find the ones that are closest to yours (they may be different sizes!) and mark that.  When I'm working with a simple skirt, I usually will opt for the hip measurement even though my waist would indicate a larger size (if your waist is bigger than your hips, you'll want to go with the size which matches closest to your waist measurement) otherwise, I'd find myself swimming in fabric around the hips making an A-line skirt more like a full skirt!  I'm no curvy girl, there's not a huge difference between waist and hip (and there's less now than used to be, lol), so I find it easier to simply adjust the waist area rather than fiddle with the shape and drape of the entire skirt. 

Maybe you fall in between "size" measurements or your waist is bigger than the "size" for your hips.  This is not unusual.

If you want to be able to keep your original intact, then I recommend tracing the pattern pieces first.  I like to use the Tru-Grid by Pellon as it is sewable, drapes more like tissue and fabric, and can be seen through for easy transfer of marks.  (Other great options include Swedish tracing paper, medical exam table paper, tracing paper...)  Once I get the originals traced off in my chosen size, and add seam allowances if needed (hello, Burda--yes, I like to pre-add the seam allowances, because I tend to forget that Burda doesn't have them already in and that makes for some very unhappy discoveries of having cut the sewing line instead), I cut generously around my tracings at the side seams (usually I leave a couple of inches extra).  Then pin along the sewing line.  (If you're using a pattern with seam allowances included, you'll want to mark this out with a pen so you have a reference line to follow.  I like to use a different color just to distinguish it from my cutting line.)  Also, pin any darts or pleats.

Now, carefully try this on over your undergarments (including slip and tights/pantyhose if you wear them normally).  You'll want to have a clip or two to hold the zipper area together so that your hands are free.  Standing in front of a mirror will help you to see any areas that aren't fitting.  Simply unpin those places and repin so that the fit is better.  Around the waist, make sure you unpin and repin in equal amounts for each side.  If the front darts are poofing funny, try taking them out or making them smaller in depth (leave the length as is).  Maybe your back darts need to be deeper (I don't have much of a booty so this is never my problem)  Also, take a look at the side seam and hem--are they straight?  If not adjust by pulling up the front or back a bit.  (By wearing a "belt" of elastic at your waist over the pattern, you'll have a reference for marking a new "waist" when done adjusting.  Mark with a pen prior to taking off the pattern.)  You may need to add width to only the front (or back) rather than both.


Here's a view of some basic adjustments (from Painless Sewing) that you can make.


At this point, I carefully take off the pattern and make a pen mark over each pin that was adjusted.  Now, make these changes to your traced off pattern.  You may need to smooth out the transition from waist to hip or the curve of the waist.  If you made your waist area larger or changed the curve of the waist, don't forget to also adjust the facing to match.

Here's a quick view of the pivot slide method for adjusting skirt width (also from Painless Sewing).


Your adjusted pattern may look a bit Frankensteined with it's additions and adjustments, but that's okay.  The point is to have a pattern that fits you perfectly which you can then use again and again.

You can see that I've added to the width at the side seam once since the original tracing and adjustment and made that same addition to the facing.  Once you've got a pattern that fits you, little adjustments for weight gain or loss are easy to make.

Once you've made your adjustments, you are ready to make your skirt.  If you still aren't sure of your adjustments, you could always make a muslin to test the pattern with real fabric.  This could be necessary if you were using something stiffer to trace your pattern on.  A muslin is also handy if your weight changes (or you're planning to change it) as you can test adjustments to that before making permanent changes to your already fitting pattern.  (I have Crohn's Disease, so regular weight change is a part of life.  Sometimes I only take in or let out a side seam a smidgen, but sometimes I need to make bigger adjustments.  And while I plan on getting into a more toned shape {aka flatten that tummy somewhat} after finally gaining some much needed weight...there's nothing wrong with having a few new skirts in the mean time.)


After some weight gain, I adjusted the pattern and tested those adjustments on my old muslin.  You can see that I still chose to leave the front darts off, but needed a bit more room at the waist for my front piece.  Much easier than doing sit ups!


While fitting the pattern adds an extra step to the process, it is well worth it to have a skirt that is fit at the waist and hips properly and already has the length you want.  Once this is done, you can focus your attention on the fun parts like choosing fabrics, embellishments and style changes!


The GBSB Sew Along Challenge 1 A-line Skirt, Part 2 FittingSocialTwist Tell-a-Friend

Saturday, January 12, 2013

First two bee blocks of 2013

2013 is off and kicking--and I've already got my two bee blocks done!

The first went to craktpot (Teri) in the Bee White Black quilting group.  Teri sent some great architectual fabric and a lovely one with a caged raven on it (LOVE this one) to be used in her block.  I couldn't help but think:  Steampunk!  Our instructions were to avoid curves, circles and really wonky lines but use rectangles, squares and slightly off lines (like a pencil line that is hand drawn and went a little off).  Think mild Gees Bend style.  I have a hard time breaking out of straight lines for these type of quilt blocks, but I did make some deliberately slightly off.


Not quite all straight lines--its a control thing.


The second block went to Ursi (by niveas) in our Sew Buzzy group.  She sent out some fabulous Tula Pink fabric and requested we make one of those Japanese + or X blocks.  We used the tutorial from City Stitches.  This one is very quick to cut and sew...unless you make the mistake I did, and sew the X parts in wrong and make an O instead!  Oh well, nothing a little seam ripper time can't fix.

This one makes a great scrappy block!

What have you started off with in 2013?
First two bee blocks of 2013SocialTwist Tell-a-Friend

Tuesday, May 3, 2011

Squished Nine Patch

I'm calling this block the Squished Nine Patch.  I'm sure it has an official name--maybe two or three like many traditional blocks--but, I don't know any of them, so you get this one.  :)  My quilt will end up being queen sized with a border, which will require 72 squares, but you don't need to make one that big.  I hope you like this block--I do.  It's quick, easy and not something you have to think over--you can just sew away!


Original vintage block on the left.  My version on the right.

This block was created off of a set of vintage/antique hand sewn blocks I mentioned earlier in the blog.  Those blocks measured 9 3/4 inches--not exactly an easy number to start figuring piecing from.  So my version measures 10 inches finished.  Way easier!  You can piece each part individually, but I chose to strip piece for a quicker version.  I'll give you measurements for individual pieces though, just in case you're working with smaller scraps.  Warning:  This tutorial might seem long and involved, but really...it's just a lot of photos taking up space.  But, I like to make sure you can see exactly what I'm explaining, so no worries--it really, really is quick to put together!

For this block you only need two different fabrics.  I chose dark navy and indigo blues contrasted with a salmon pink.


Each block starts with these pieces.

Strip piecing measurements:
2 blue strips 4.25 x 9 inches
1 blue square 3 inches
2 pink strips 3 x 9 inches

Individual piecing measurements:
4 blue squares 4.25 inches
1 blue square 3 inches
4 pink rectangles 3 x 4.25 inches

All seams are a scant 1/4 inch.  I used a navy thread, but any neutral or matching thread will work fine.

Step One:

Take one of the pink strips, lay it horizontally and cut in half.  You should now have two 3 x 4.5 inch rectangles.


Step Two:  Match the blue square to one pink rectangle, right sides together, aligning them on the 3 inch side of the rectangle.  Take the other pink strip and one blue strip, right sides together, aligned along one of the long sides.


Step Three:  Sew along the short side of the rectangle/square combo and along the long side of the strip combo.  You can see my dark thread line below.


Step Four:  Set seams by first pressing flat and then press open.  Press seam allowances towards the blue fabric.


See how the seams go towards the blue fabric--this will be important later for accurate alignment.


Step Five:  Now attach the other pink rectangle to the other side of the blue square.  Also sew the other blue strip to the other long side of the pink strip.


Again, see the thread line below--it clearly shows you which side to sew along.


Step Six:  Set seams and press seam allowances towards the blue fabric.


Your seam allowances in each section will be opposite because you've pressed them towards the blue fabric on each one.


Step Seven:  Set the skinny strip aside.  Take the larger section and cut in half vertically.  You will now have two matching fatty strips that are 4.25 inches wide each consisting of two blue squares with a pink rectangle in the middle.


Step Eight:  Space the two fatty strips apart with the skinny strip now in the middle like this.


Step Nine:  You will now place the skinny strip, right side down, on the fatty strip to the left.  Align the strips at the seams (where the white arrows are pointing).  They should just settle right into place because of the seams being in opposite directions.


See how they just line right up and kind of nestle in place.  This will help you get nice, accurate points on your corners.  Very important.  I like to add a couple of pins to the sides of the seam to hold them in place until I sew them.


Step Ten:  Sew down the vertical length of these strips like this.


Step Eleven:  Set seam and press seam allowance towards the fatty strip.


Step Twelve:  You should now have two sections--a big fat one and one of the remaining fatty strips (the one that was on the right of the skinny strip earlier.)  Take this remaining fatty strip and attach it to the big section, aligning it on the right side of what was previously the center skinny strip.  Set seams and press seam allowance towards the fatty strip.


Once pressed open, your block should look like this.  It's almost finished.  Can you see the "squished" squares of the nine patch?


Your block should line up so that the center, where all the corners meet, is all aligned with all corners at ninety degrees and level--no wonkiness or overlapping desired!  (See the white arrows below.)


Look at those perfect corners and center square--that's what you're looking for!  My seams really are straight, despite the photo.  Take your time to get great results.
  Step Thirteen:  Your final step is simply to square up your block to 10.5 inches.  Align from the center of the block in order to assure that your center square is in the actual center of your block and not slightly to one side.

Ta Dah!  Pretty quick wasn't it?  I'll bet you can sew these blocks up faster than you can read this tutorial!


 Have fun making the Squished Nine Patch!
Squished Nine PatchSocialTwist Tell-a-Friend

Thursday, March 3, 2011

Vintage Liberation Quilt Block

While looking at vintage quilts, blocks and patterns on Ebay recently, I came across a particularly interesting vintage quilt.  Despite the fabrics being obviously older, the pattern actually reflected similar designs now called modern.  Now this quilt (which seems to contain every fabric she ever came across in this one quilt) was made lovingly by someone somewhere long ago, but she would have related well to all the wonky and liberated quilters out there.  So in honor of that early quilt maker, I'm naming this block inspired by her quilt, Vintage Liberation.  I had a lot of fun making this block.  It's quick, easy, requires very little measurement and even less pinning.  This is a great 12.5 inch block to use up all those little scraps that were too short for a string quilt and too narrow for squares.  Here she is:


I'll be making my quilt blocks in Spring and Summer tones, so no blacks, navys, autumn hues, icy blues, etc.  We're talking warm, cheerful, happy colors! 

Warning:  I actually worked on two blocks at the same time, so you will see some photos from each.  Don't get confused by this, they're the same steps, just different fabrics.

For supplies you will need:  rotary cutter, quilting ruler (I used my 6.5x24 in, 4x14in, and 15 in square ones, but you really don't need that many, just something to measure at least 5.5 inches and something to measure around 14 inches), pencil, tweezers, 4 pieces of regular printer paper (or thinner if you have it), one piece of print fabric measuring at least 6 in x 13 in, assorted scraps some of which should be at least 9 inches long.  Your scraps can be a mix of prints and solids, just use what's in your scrapbag.  Of course you'll want your sewing machine (so much faster than hand sewing), 75/11 or 80/12 universal or sharp needle, neutral colored cotton thread (I used a light gray) and a cutting mat.

Let's get started!

First, you'll need to cut four (4) 5.5 inch squares from the printer paper.  Be accurate.  The neater job you do here, the better results you'll see at the end.  Once cut, you can draw lines at varying angles across (these will be stitching lines like in foundation piecing) or you can leave it blank and just work as you go.  I did a little of both.  Lines might be easier if you aren't very familiar with wonky or liberated style blocks.  (Hey, don't mock security blankets, they keep you from getting frustrated until you are ready to let go!)  Remember when drawing your lines that you will want 3-6 sections for best results and you don't really want them all even--we're being liberated!


You'll also want to draw in your 1/4 inch seam allowances.  You can always wait and do this part later, but it is easier when the paper is flat and doesn't have fabric sewn to it!


Now you can begin attaching your scraps.  Start anywhere on the square--corner, middle, off-center--it all works!  I base my starting point on my fabric piece size.  Smaller piece?  Start at a corner.  Wherever you start, the fabric must cover from one edge of the block to the opposite at whatever angle you've chosen.  Be a little generous with yourself on estimating needed sizes and you'll find yourself a lot less frustrated with pieces that don't quite fit after being sewn, believe me, I know!  (Tip:  Shorten your stitch length, it will make removing the paper later much easier.)  Each piece you sew down should have at least one straight edge to follow when stitching, after all, you want liberated/wonky not curvy.  As you add each piece, be sure and trim, press to set the seam, then fold open and press again.  I prefer a dry iron when working with paper foundations.  I only pin the first piece down to hold it in place.  The next piece is place right side down on top of the first.  You will stitch either along your pre-drawn lines (double check that you definitely left yourself a seam allowance) or use the straight edge of the second piece as a guide.  Use 1/4 inch seams.  Lay pieces down at varying angles as you work across the block.


If you're working without pre-drawn lines, you'll work from the fabric side.  Again, use the straight edge of each piece as your sewing guide.  Don't try to just wing it and sew across your fabric without a straight edge to guide you, it is way too easy to start getting a wobbly line and you will be disappointed in your results.  Here you can see that the bottom fabric piece sticks out and doesn't line up with the current top piece.  That's normal!  I'll show you how to get rid of the excess as you go in just a moment.


If you are sewing following drawn lines, you will sew from the paper side of the square.  I like to hold the paper up to the light so I can see the fabric through it and adjust my angle and seam allowance before stitching down.


 Now, each time you stitch some fabric down, you'll have some excess beyond the normal 1/4 inch seam allowance.  This is normal because you are sewing in a wonky style.  But, you won't want to keep that excess, so you will want to trim as you go.  Keep your rotary cutter and a small ruler hand for quick accurate cutting.


First, flip the block to paper side up and fold back the paper that is under the excess part--you don't want to cut your paper!  The sewn seam will provide a nice fold line.


Now flip back to fabric side up and line your ruler up along the stitched seam so that you have a 1/4 inch seam allowance allowed and trim off the extra fabric.


Now fold the paper back to its original location.  Continue pressing and adding fabric until you've covered the entire 5.5 inch square.


Once your square is finished, use your straight edge ruler and rotary cutter to carefully trim off any fabric sticking out beyond the paper.  Be careful not to trim into the paper!


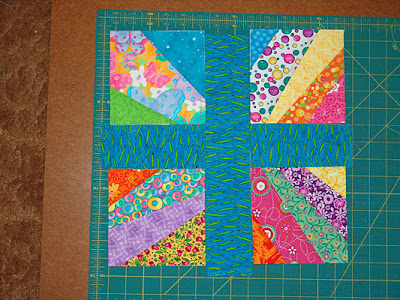
Move your blocks around until you find an arrangement you like.  Here are two blocks worth that I've sewn up.  You can see I've arranged one in almost a diamond shape and the other in an X shape.  I like both equally well.  You don't have to form these patterns, you could have them going any direction really.  Find what is most visually appealing with the fabrics and lines that you have.  This also lets you see the variety to the wonkiness of the fabric scrap strips.


Take your 6x13 piece of print.  You will cut two 2.5 inch strips from this.  Next, taking one strip, cut two 6 inch pieces.  (These strips are a bit longer than what you'll need.  This gives you a bit of wiggle room when sewing down the first side which can sometimes "adjust" itself on you.)


I like to lay out my blocks and strips to preview what the final block will look like.  It can get a bit crazy with all those prints, so you want something that gives interest, not eye-strain!  I went with a pink print for one set which had more Spring-like tones and a blue print for the more Summer-ish set of squares.


At this point, I often take a quick digital snapshot so that I can remember my block layout once I start picking up and sewing pieces.  This is especially helpful if you're making more than one block at a time!


You are now ready to sew on the strips.  Start with the shorter ones.  Place right sides together.  Match up the longer edge of the strip to the edge of the square.  Let the small extra length of the strip hang off both sides.  If needed, use a pin or two to hold the strip in place.  You want to line up the edges of the strip, the fabric strips and the paper square.  


Now flip the square over and stitch along the lines you drew earlier to form the 1/4 inch seam allowance.  The lines, you will find, allow you to focus on keeping the edges lined up without worrying about a consistent seam allowance which is important for best results.  You may find that you also sew a bit faster as you only need to follow the line!


Press open so that the seam allowance goes towards the strip.  This helps cut down on bulk.  Trim the strip so that the edges are now even with the square.


Repeat the process with another square and the other long edge of the short strip.  Again press the seam towards the strip.  Do this for each short strip.  You will end up with two "paired" squares like this.


The long strip is the last sewing part!  Line up the long edge on the edge of one set of paired squares.  I like to work left to right, it helps me keep things straight, but feel free to work right to left.  Let the extra length hang off each end.  I recommend using a few pins to hold the strip in place.  Flip to the paper side and sew along your lines (just like you did for the short strips).  Press seam allowance towards the strip.


Trim the long strip so that it is even with the paired squares.  This view of the back shows you all the seams at this point.  You can see how quickly the bulk would build up if you didn't press towards the strips!  Sew the second pair of squares to the other side of the strip and press towards the strip.


Your block should now look like this from the back.  I like to give the whole block a good press prior to removing the paper foundation.  I find the paper comes off easiest if I start with removing the paper in the outer edge seam allowances and then work from an outer corner towards the middle.  Fold each paper section (not the fabric) back before tearing away and then carefully tear off paper.  This is not an exercise in brute strength.  Take your time and work gently to avoid distorting your carefully made blocks or pulling stitches.  I like to work on paper removal during mindless television moments like commercials or the Oscars.  But this block is pretty quick.  Use your tweezers to snag little bits that get caught--just be careful not to snag some of the seam's thread too.  Remember, really tiny bits will wash out when the quilt is laundered at some point in the future, so don't go blind trying to get microscopic bits of paper out of tight corners!


If you were neat and careful in your cutting, trimming, pressing and seam allowances, you will probably not even need to do further squaring up.  Here are my two Vintage Liberation blocks:


I plan on joining my blocks with a 2.5 inch strip sashing with 2.5 inch squares at the meeting points.  I haven't decided if I'll use a print or a solid--I'm still having fun with blocks.  And best of all, my scrap pile is getting smaller!  Go get your scrapbag and make yourself a quilt!
Vintage Liberation Quilt BlockSocialTwist Tell-a-Friend
Related Posts Plugin for WordPress, Blogger...