
We all know that fashion designers exist--they are the ones who create the concepts for the clothes we wear and the sewing patterns we buy. Fashion designers are needed for movie costumes and red carpet events, as well as, athletic clothes (someone had to design this year's Olympic team outfits) and jewelry. Designers range from the uber-famous such as Armani and Chanel to the unknown college student. But, when you stop and really think about it, you are also a fashion designer. In fact, anyone who has ever picked out clothing for an outfit or chosen specific fabric to go with a particular pattern is a designer--just on a smaller scale. So, why not put your ideas onto paper?
Not everyone will see their creations strut down the runway of a major show, but that doesn't mean a thoughtful plan isn't necessary. By putting your ideas onto paper, you take them from imagination and bring them one step closer to reality. In fact, it is a great way to preview fabric and clothing combinations before you expend additional time and money.
Even if you don't design your own patterns or practice draping, drawing your ideas out and including colors and patterns similar to what you plan to use or showing adjustments you'd like to make can help you decide whether it will give the results you are after. I do this in two ways--first, I find a pattern I really like and sketch out the view I'd like to try with my choice of fabrics and the second, I sketch out what I'd like to make and then find the patterns that most closely match my ideas. Either way, I get to see if what I think would look good, really does.
You'll need some basic supplies to begin delving into the world of fashion illustration: sketch book paper (I prefer a white paper over a "natural" paper for tracing purposes) or typing paper will work in a pinch; a pencil (I prefer mechanical ones so that I don't lose the sharp point); a good eraser (such as a PaperMate Black Pearl which gives a good edge and doesn't smudge ink or tear paper); something to add color such as pens, markers, coloring pencils or crayons; and if you aren't very good at drawing the human figure, you'll want some croquis to trace.
A croquis, pronounced like saying "crow key" , is simply what fashion illustrators call their drawings. There are several sites out there that offer crocquis templates which allow you to trace the figure onto your paper and then add clothing designs and color. Just print them off on your computer, place that paper underneath your sketching paper (now you know why I like white--easier to see the lines) and trace in pencil.
Here are a few sites to get you started, although later I will show you how to make a croquis of yourself:
Fashion Templates (only $1 per croquis)
Threads Croquis Family (free, but quite basic)
Alley Cat Scratch (free, but basic)
Designers Nexus (free)
Go get your supplies and find a croquis that is similar to your body shape--or one that just inspires you to design--and in Part 2, I'll go through the process of illustrating your design!
Tuesday, February 23, 2010
Monday, February 22, 2010
February: One Garment A Month Sew Along Result
For February, I decided I really needed some warmer pajama bottoms, so that is what I made. Pajama bottoms are a great project for beginners, as well as, an easy gift to make for others--so no excuses, anyone can make some!
For this one I used Butterick 4038 for my pattern. I made view F, the full length pant in a size S with adjustments for length. (Eventually, I'll go back and make the hooded top.) I used some leftover fabric from the backing of a denim quilt I made my brother one year for his birthday. It was from a plush minkie fleece blanket I found on sale at the local Fred Meyer store, queen size. So, after the quilt there were these fairly narrow strips of fabric leftover, just the right size for the pattern pieces. The plush fabric is a burgandy color and much thicker than the cuddle minkie you'll find at stores like JoAnns, so I'm quite pleased at the snugglly factor in these jammies. (Seriously, its like walking around in a cuddly blanket--I may never wear jeans again.)

Nice, right? (I went outside for photos as it is currently nice and sunny out there, but it does make the pjs appear more reddish than they really are--that or my camera's on the fritz again.)
I serged all the main seams and the edges at the waist and hem (the later to finish off the fabric edge and stop it from shedding all the little red fluffy bits). I also made a small stitch in the seam with embroidery floss to mark the front. While I was sewing I marked the front pieces with a pin to keep them straight from the back pieces which look almost the same. This makes it much easier once you start attaching fronts to backs and sewing the crotch seam at which point it is so easy to end up with a very messed up project (which is always frustrating, but especially so on such an easy pattern).

This pattern has an elastic waistband instead of a drawstring. One word of caution about the pattern. It tells you to take the measurement of your waist and add an inch for the amount of elastic. Ah, hello? Elastic stretches, you don't want it larger than you already are or it won't hold the pants up! So cut your elastic this way: measure your waist and subtract an inch or two (depending on how stretchy your elastic is).


Cost:
Fabric: $0 (leftovers from another project)
Elastic: $1.37 (but only used some of the package)
Pattern: $1.99
Thread: $0 (leftovers from another project)
Total: $ 2.30
For this one I used Butterick 4038 for my pattern. I made view F, the full length pant in a size S with adjustments for length. (Eventually, I'll go back and make the hooded top.) I used some leftover fabric from the backing of a denim quilt I made my brother one year for his birthday. It was from a plush minkie fleece blanket I found on sale at the local Fred Meyer store, queen size. So, after the quilt there were these fairly narrow strips of fabric leftover, just the right size for the pattern pieces. The plush fabric is a burgandy color and much thicker than the cuddle minkie you'll find at stores like JoAnns, so I'm quite pleased at the snugglly factor in these jammies. (Seriously, its like walking around in a cuddly blanket--I may never wear jeans again.)

Nice, right? (I went outside for photos as it is currently nice and sunny out there, but it does make the pjs appear more reddish than they really are--that or my camera's on the fritz again.)
I serged all the main seams and the edges at the waist and hem (the later to finish off the fabric edge and stop it from shedding all the little red fluffy bits). I also made a small stitch in the seam with embroidery floss to mark the front. While I was sewing I marked the front pieces with a pin to keep them straight from the back pieces which look almost the same. This makes it much easier once you start attaching fronts to backs and sewing the crotch seam at which point it is so easy to end up with a very messed up project (which is always frustrating, but especially so on such an easy pattern).

This pattern has an elastic waistband instead of a drawstring. One word of caution about the pattern. It tells you to take the measurement of your waist and add an inch for the amount of elastic. Ah, hello? Elastic stretches, you don't want it larger than you already are or it won't hold the pants up! So cut your elastic this way: measure your waist and subtract an inch or two (depending on how stretchy your elastic is).

For the waistband, I folded the serged edge under and then folded to the fold line shown on the pattern. I then topstitched with a straight stitch around and, because this fabric is so plush and I wanted to be very sure it was sewn down permanently, I also stitched with a zigzag stitch over the folded edge after I'd inserted the elastic. This is a very comfortable waist--no pinching or sagging.
For the hems, I just folded under the serged edge and topstitched it down. Easy peasy.

Cost:
Fabric: $0 (leftovers from another project)
Elastic: $1.37 (but only used some of the package)
Pattern: $1.99
Thread: $0 (leftovers from another project)
Total: $ 2.30

Saturday, February 20, 2010
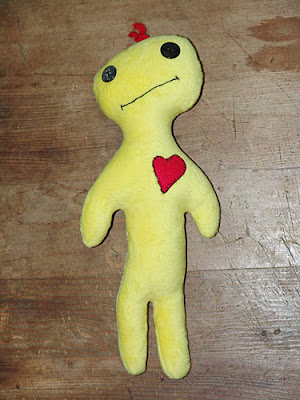
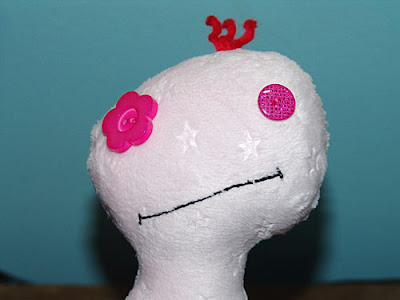
January: One Doll/Softie a Month Challenge
Okay, I've been working on some softie patterns of my very own. Here is one line that I designed this December--I call them Mojo Dolls, although my brother says I should call them Weirdies. So, at the end of this post, is a poll--you can help decide the name of this softie line!
I made six different ones ( the prototypes were tested in December) in January, all from the same pattern, but due to materials and the nature of anything handmade, each is just a bit different--I really like that about handmade toys. These will end up in my etsy shop later (after their official photo shoot)--kind of sad to see them leave though. I'm considering making the pattern available for those DIYs out there, just need to write up the instructions with step by step images.
Warning: These are just snapshots, so don't expect the world's best photos. (Sorry, I just had a few minutes to grab some images so you could see that I met the monthly challenge.)
Green Softie


Blue Softie


I made six different ones ( the prototypes were tested in December) in January, all from the same pattern, but due to materials and the nature of anything handmade, each is just a bit different--I really like that about handmade toys. These will end up in my etsy shop later (after their official photo shoot)--kind of sad to see them leave though. I'm considering making the pattern available for those DIYs out there, just need to write up the instructions with step by step images.
Warning: These are just snapshots, so don't expect the world's best photos. (Sorry, I just had a few minutes to grab some images so you could see that I met the monthly challenge.)
Green Softie


Orange Softie


Yellow Softie


Pink Softie


Fuschia Softie--I had a had time getting a good photo of this one. The fabric is a lovely fuschia/pink stretch velvet (so soft!) which has a luster to it that was just giving my camera fits in the lighting. Can't wait to set up the correct lighting and make it look as good in the photo as in real life.


What should I name this line of Softies?
Friday, February 19, 2010
January: One Garment a Month Sew Along Result
Okay, because I decided to join the Pattern Review sew along the last bit of January, I decided to finish an unfinished project instead of trying to start a new one from scratch. I finished the dog coat for my beloved borde collie/Australian shepard mix, Stars.
Pattern Used: Butterick 4226 (read my review by clicking on the My Reviews in the right column)
Size: Large (I wanted extra coverage for the cold.)
Fabric/Notions:
Outer fabric is a medium-light blue denim
Lining is a baby pink lightweight sweatshirt fleece (soft fuzzy side sewn out)
Binding: 1/2" single fold bias tape in bright pink
2" wide white sew-on Velcro
Coats and Clark Dual Duty thread in bright pink
Cost:
Denim $2 (with extra for another project)
Fleece free (a garage sale find given to me)
Binding 2 packages @ $ 1.67 each (JoAnns with a 40% off coupon, only used about 1 and 1/3 packages)
Velcro 16 inches @ $ .09/inch (JoAnns by the yard with 40% off coupon)
Thread $1.30 (JoAnns during a 50% off sale)
Pattern $1.99 (JoAnns sale)
Total: $8.96
And what did I get for the money? One very happy border collie.


I thought the bright pink binding added a nice touch of contrast with the denim and especially helped the collar to become a more noticable design feature.


Stars is very proud of his new coat--when I put it on him, he goes around and shows everyone how good he looks. The first time he was outside wearing the coat, he laid down and went to roll--I exclaimed, "Stars, you'll get your coat dirty!" and he jumped right up and tried to inspect his coat for dirt! (Don't worry, I explained to him that it is washable, and he now happily sits and lays outside without worry of dirt ruining his fabulous fashion.) He did however let me know when he was done modeling for the camera.

Pattern Used: Butterick 4226 (read my review by clicking on the My Reviews in the right column)
Size: Large (I wanted extra coverage for the cold.)
Fabric/Notions:
Outer fabric is a medium-light blue denim
Lining is a baby pink lightweight sweatshirt fleece (soft fuzzy side sewn out)
Binding: 1/2" single fold bias tape in bright pink
2" wide white sew-on Velcro
Coats and Clark Dual Duty thread in bright pink
Cost:
Denim $2 (with extra for another project)
Fleece free (a garage sale find given to me)
Binding 2 packages @ $ 1.67 each (JoAnns with a 40% off coupon, only used about 1 and 1/3 packages)
Velcro 16 inches @ $ .09/inch (JoAnns by the yard with 40% off coupon)
Thread $1.30 (JoAnns during a 50% off sale)
Pattern $1.99 (JoAnns sale)
Total: $8.96
And what did I get for the money? One very happy border collie.


I thought the bright pink binding added a nice touch of contrast with the denim and especially helped the collar to become a more noticable design feature.

I used bright pink thread to attach the binding and to sew on the velcro. When sewing the velcro, I used a zigzag stitch--the stitching was going to show, so why not make it part of the design, right?

The contrasting soft pink lining is not only beautiful with both the denim and the binding, but by sewing the soft fuzzy side out, it is very cuddly and warm.

I used two strips of the Velcro per band. Stars often runs through the plants, jumps, and rolls, so I did not want to chance an end of the bands poking out and catching or tripping him.

Stars is very proud of his new coat--when I put it on him, he goes around and shows everyone how good he looks. The first time he was outside wearing the coat, he laid down and went to roll--I exclaimed, "Stars, you'll get your coat dirty!" and he jumped right up and tried to inspect his coat for dirt! (Don't worry, I explained to him that it is washable, and he now happily sits and lays outside without worry of dirt ruining his fabulous fashion.) He did however let me know when he was done modeling for the camera.

Thursday, February 18, 2010
2009 Dolls
Before I begin showing my creations from the sew along challenges, I thought I'd really quick show some dolls I made last year--you know you want to see them!
Here is my very first Edith Ackley Flack style doll--Angel (because she's so lovely). This is from the To Greet a Little Girl doll pattern designed by Edith Ackley Flack. I made her almost completely from my stash--I did have to buy yarn for hair (around $4) and some faux leather for the shoes (around $3). All her clothes are removable (hook and eye) and she has a little slip, chemise and pantaloons with lace and pintucks. Hand embroidered face too. Isn't she lovely. If you haven't made one of these heirloom style dolls, you really should. They're a bit of work, but oh so wonderful when finished. I'm working on a second one for the February month of the challenge.


This one was made with the Long-legged Annie pattern.


Here is my very first Edith Ackley Flack style doll--Angel (because she's so lovely). This is from the To Greet a Little Girl doll pattern designed by Edith Ackley Flack. I made her almost completely from my stash--I did have to buy yarn for hair (around $4) and some faux leather for the shoes (around $3). All her clothes are removable (hook and eye) and she has a little slip, chemise and pantaloons with lace and pintucks. Hand embroidered face too. Isn't she lovely. If you haven't made one of these heirloom style dolls, you really should. They're a bit of work, but oh so wonderful when finished. I'm working on a second one for the February month of the challenge.


Here are two of the little Raggedy Ann style dolls I made from patterns designed by Dee over at Oh Sew Dollin. They are made with tea-dyed muslin, hand painted eyes and legs, hand embroidered face (and heart on the body). Aren't they just adorable--love their hair! I did purchase the 2 fat quarters for each of the dresses ($5 per doll), the hair ($5.99 per skein), the tea bags ($1.99), giant rickrack trim ($1.50) and the buttons ($1.50 each). I don't normally go buy everything to try out a new doll pattern, but these were so cute that I just couldn't resist.
This one was made with the My Annie pattern. (This one became part of my mom's Christmas presents and is now carefully guarded in her room.)


This one was made with the Long-legged Annie pattern.


The Price of Fashion
Been shopping for clothes lately? If you have, then you may have also noticed the price tags and, unless your idea of couture is Walmart, you would have also noticed that decently constructed, quality clothes cost a bit more than a few shiny pennies. I'm not even talking Armani or Dior here. No, I'm talkin' regular ol' department store types like Ann Taylor, White House Black Market, Gap, and Abercrombie. Over a $150 for a dress--are you kidding me? $98 for capri's--yeah, right. (And no, the sparkle isn't worth the extra $50.) Hey, don't get me wrong, I'm all for stores making profits, employing people, and marketing their products (and I do love some of their products), but if you're feeling the pinch in the pocket book, then you understand exactly how I feel--like highway robbery is occuring. So what's a girl to do?
Well, going naked is definitely out--there's just some things no one should have to see. So that leaves you with three main options--pay their outrageous prices, give up and buy from less expensive sources, or get your talent on and make your own couture! Now, you know I'm not about to pay those prices. There's just no way--not with my budget (I'm funding my eternal collection of fabric and my border collie would disown me if I stopped the supply of biscuits).
Less expensive sources can include thrift stores (find the ones near richer areas, better stuff), discount stores like Walmart and Target, eBay (look for NWOT--new without tags) and clearance racks (watch for those 60% off lowest prices days). Of course, if you're like me and not an average sized individual in some way, you may find it tricky to find well fitting, classy and inexpensive all at once in the same garment. I love eBay for this purpose--quickly search for specifics without dragging yourself all over town and a huge selection which is really nice when you live in a small town and the thrift stores are limited. Of course, with some basic sewing skills your options are much greater. You don't need to be able to construct a handsewn silk wedding gown either. Simple skills like sewing buttons and knowing how to do proper hems can open opportunities in what ready-to-wear (RTW) will fit and look good, and it only grows from there. Imagine finding pants that fit perfectly in the waist and hips, but they're too long (it seems like all pants are made for the women's basketball team). Suddenly those hemming skills come to the rescue. My mom found brand new jeans at Christopher & Banks for $9.99 and with a 1 inch hem adjustment, they'll fit perfectly. And who can argue with $10 jeans--you'd have a hard time making a pair for that!
Which brings me to the last option--make your own clothes. Many view sewing as some sort of mysterious cult of grandmothers--knowledge passed on secretly to the next generation only when deemed worthy...but really, it's not as hard as it looks. And, with a little creativity, it's not as expensive either. Did you know that JoAnn's (a fabric and craft store) puts patterns on sale every month? I just bought 10 Simplicity patterns for a $1 each. Most fabric stores also have a clearance area. My favorite source for the inexpensive is thrift stores and auctions. Sure, you'll have to sort through a ton of double knit polyester (that stuff will still be around when cockroaches inherit the earth) and most of the patterns are vintage--but, the right vintage is back in and sometimes, in between the orange paisleys and scratchy grandma fabrics, you'll find a sweet deal on some fabric that is worth having.
Sure, I love high quality fabric--and its worth it for those wardrobe staples or really important outfits that you want to put the time into. After all, how much would you have to pay for a custom fit and design. Still, its nice to have some wardrobe pieces that you don't invest too heavily in--such as trendy seasonal pieces or learning items. If I haven't made a pattern before, sometimes its worth creating a "wearable muslin" or a test in cheaper fabric so that I don't mess up the good stuff. If it works out, great, another item to wear--and if not, I'm not crying over ruined silk.
So, you're probably wondering if you really can get a handmade item on the cheap--so I'll prove it too you. (Whenever possible, in the future, I'll list my sources and prices.) Here's the jacket I made for an online sewing class I took through Pattern Review (it was the Stitch and Flip Jacket class with Shannon Gifford). People want to know where I bought it. The key--careful construction and proper pressing equals professional results. Then wear yourhandmade custom item with your RTW and it will blend right in, no one will guess.


Supply/Cost List:
Denim fabric, local senior center thrift store, $2.00 (and there's enough left over for a skirt or something)
Floral cotton fabric, mom's stash--traded for taking ebay photos, $2.00 (leftovers for a future project too)
Metal floral buttons, Joann's 50% off, $4.78
Fusible Interfacing, Palmer Pletch, $7.95 for whole pkg, used around 1/4--$2.50 (lots of leftover for future projects)
Thread, personal stash
Pattern, JoAnn's sale, $1.99 (check out my reviews in the right column)
Total: $13.27
Oh yeah, baby--even on my budget $13.27 is totally doable. The best part--it fits perfectly!
Well, going naked is definitely out--there's just some things no one should have to see. So that leaves you with three main options--pay their outrageous prices, give up and buy from less expensive sources, or get your talent on and make your own couture! Now, you know I'm not about to pay those prices. There's just no way--not with my budget (I'm funding my eternal collection of fabric and my border collie would disown me if I stopped the supply of biscuits).
Less expensive sources can include thrift stores (find the ones near richer areas, better stuff), discount stores like Walmart and Target, eBay (look for NWOT--new without tags) and clearance racks (watch for those 60% off lowest prices days). Of course, if you're like me and not an average sized individual in some way, you may find it tricky to find well fitting, classy and inexpensive all at once in the same garment. I love eBay for this purpose--quickly search for specifics without dragging yourself all over town and a huge selection which is really nice when you live in a small town and the thrift stores are limited. Of course, with some basic sewing skills your options are much greater. You don't need to be able to construct a handsewn silk wedding gown either. Simple skills like sewing buttons and knowing how to do proper hems can open opportunities in what ready-to-wear (RTW) will fit and look good, and it only grows from there. Imagine finding pants that fit perfectly in the waist and hips, but they're too long (it seems like all pants are made for the women's basketball team). Suddenly those hemming skills come to the rescue. My mom found brand new jeans at Christopher & Banks for $9.99 and with a 1 inch hem adjustment, they'll fit perfectly. And who can argue with $10 jeans--you'd have a hard time making a pair for that!
Which brings me to the last option--make your own clothes. Many view sewing as some sort of mysterious cult of grandmothers--knowledge passed on secretly to the next generation only when deemed worthy...but really, it's not as hard as it looks. And, with a little creativity, it's not as expensive either. Did you know that JoAnn's (a fabric and craft store) puts patterns on sale every month? I just bought 10 Simplicity patterns for a $1 each. Most fabric stores also have a clearance area. My favorite source for the inexpensive is thrift stores and auctions. Sure, you'll have to sort through a ton of double knit polyester (that stuff will still be around when cockroaches inherit the earth) and most of the patterns are vintage--but, the right vintage is back in and sometimes, in between the orange paisleys and scratchy grandma fabrics, you'll find a sweet deal on some fabric that is worth having.
Sure, I love high quality fabric--and its worth it for those wardrobe staples or really important outfits that you want to put the time into. After all, how much would you have to pay for a custom fit and design. Still, its nice to have some wardrobe pieces that you don't invest too heavily in--such as trendy seasonal pieces or learning items. If I haven't made a pattern before, sometimes its worth creating a "wearable muslin" or a test in cheaper fabric so that I don't mess up the good stuff. If it works out, great, another item to wear--and if not, I'm not crying over ruined silk.
So, you're probably wondering if you really can get a handmade item on the cheap--so I'll prove it too you. (Whenever possible, in the future, I'll list my sources and prices.) Here's the jacket I made for an online sewing class I took through Pattern Review (it was the Stitch and Flip Jacket class with Shannon Gifford). People want to know where I bought it. The key--careful construction and proper pressing equals professional results. Then wear your


Supply/Cost List:
Denim fabric, local senior center thrift store, $2.00 (and there's enough left over for a skirt or something)
Floral cotton fabric, mom's stash--traded for taking ebay photos, $2.00 (leftovers for a future project too)
Metal floral buttons, Joann's 50% off, $4.78
Fusible Interfacing, Palmer Pletch, $7.95 for whole pkg, used around 1/4--$2.50 (lots of leftover for future projects)
Thread, personal stash
Pattern, JoAnn's sale, $1.99 (check out my reviews in the right column)
Total: $13.27
Oh yeah, baby--even on my budget $13.27 is totally doable. The best part--it fits perfectly!
Subscribe to:
Posts (Atom)


