Thursday, March 3, 2011

Vintage Liberation Quilt Block

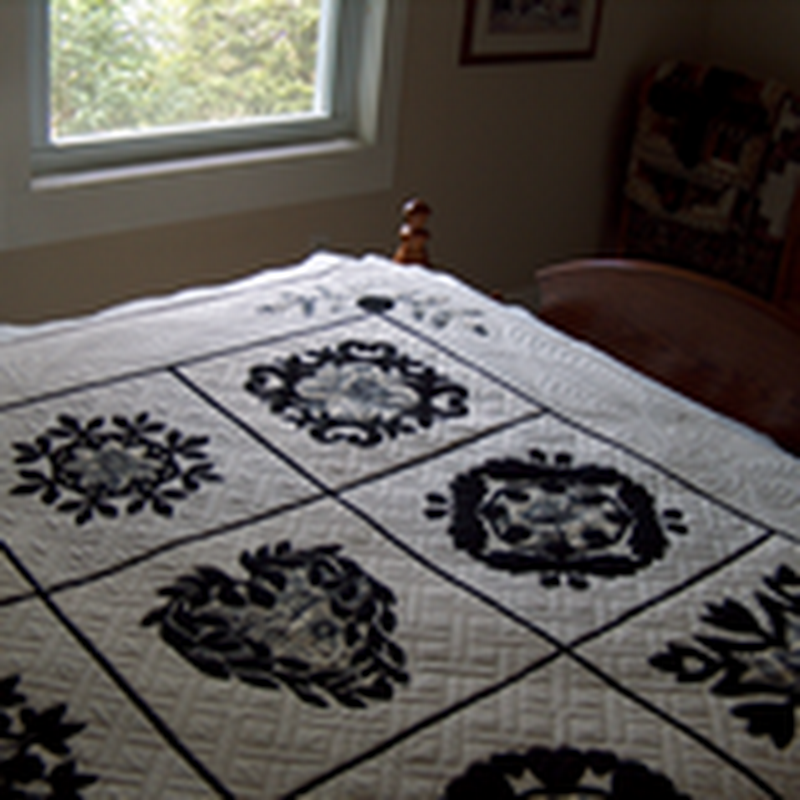
While looking at vintage quilts, blocks and patterns on Ebay recently, I came across a particularly interesting vintage quilt.  Despite the fabrics being obviously older, the pattern actually reflected similar designs now called modern.  Now this quilt (which seems to contain every fabric she ever came across in this one quilt) was made lovingly by someone somewhere long ago, but she would have related well to all the wonky and liberated quilters out there.  So in honor of that early quilt maker, I'm naming this block inspired by her quilt, Vintage Liberation.  I had a lot of fun making this block.  It's quick, easy, requires very little measurement and even less pinning.  This is a great 12.5 inch block to use up all those little scraps that were too short for a string quilt and too narrow for squares.  Here she is:


I'll be making my quilt blocks in Spring and Summer tones, so no blacks, navys, autumn hues, icy blues, etc.  We're talking warm, cheerful, happy colors! 

Warning:  I actually worked on two blocks at the same time, so you will see some photos from each.  Don't get confused by this, they're the same steps, just different fabrics.

For supplies you will need:  rotary cutter, quilting ruler (I used my 6.5x24 in, 4x14in, and 15 in square ones, but you really don't need that many, just something to measure at least 5.5 inches and something to measure around 14 inches), pencil, tweezers, 4 pieces of regular printer paper (or thinner if you have it), one piece of print fabric measuring at least 6 in x 13 in, assorted scraps some of which should be at least 9 inches long.  Your scraps can be a mix of prints and solids, just use what's in your scrapbag.  Of course you'll want your sewing machine (so much faster than hand sewing), 75/11 or 80/12 universal or sharp needle, neutral colored cotton thread (I used a light gray) and a cutting mat.

Let's get started!

First, you'll need to cut four (4) 5.5 inch squares from the printer paper.  Be accurate.  The neater job you do here, the better results you'll see at the end.  Once cut, you can draw lines at varying angles across (these will be stitching lines like in foundation piecing) or you can leave it blank and just work as you go.  I did a little of both.  Lines might be easier if you aren't very familiar with wonky or liberated style blocks.  (Hey, don't mock security blankets, they keep you from getting frustrated until you are ready to let go!)  Remember when drawing your lines that you will want 3-6 sections for best results and you don't really want them all even--we're being liberated!


You'll also want to draw in your 1/4 inch seam allowances.  You can always wait and do this part later, but it is easier when the paper is flat and doesn't have fabric sewn to it!


Now you can begin attaching your scraps.  Start anywhere on the square--corner, middle, off-center--it all works!  I base my starting point on my fabric piece size.  Smaller piece?  Start at a corner.  Wherever you start, the fabric must cover from one edge of the block to the opposite at whatever angle you've chosen.  Be a little generous with yourself on estimating needed sizes and you'll find yourself a lot less frustrated with pieces that don't quite fit after being sewn, believe me, I know!  (Tip:  Shorten your stitch length, it will make removing the paper later much easier.)  Each piece you sew down should have at least one straight edge to follow when stitching, after all, you want liberated/wonky not curvy.  As you add each piece, be sure and trim, press to set the seam, then fold open and press again.  I prefer a dry iron when working with paper foundations.  I only pin the first piece down to hold it in place.  The next piece is place right side down on top of the first.  You will stitch either along your pre-drawn lines (double check that you definitely left yourself a seam allowance) or use the straight edge of the second piece as a guide.  Use 1/4 inch seams.  Lay pieces down at varying angles as you work across the block.


If you're working without pre-drawn lines, you'll work from the fabric side.  Again, use the straight edge of each piece as your sewing guide.  Don't try to just wing it and sew across your fabric without a straight edge to guide you, it is way too easy to start getting a wobbly line and you will be disappointed in your results.  Here you can see that the bottom fabric piece sticks out and doesn't line up with the current top piece.  That's normal!  I'll show you how to get rid of the excess as you go in just a moment.


If you are sewing following drawn lines, you will sew from the paper side of the square.  I like to hold the paper up to the light so I can see the fabric through it and adjust my angle and seam allowance before stitching down.


 Now, each time you stitch some fabric down, you'll have some excess beyond the normal 1/4 inch seam allowance.  This is normal because you are sewing in a wonky style.  But, you won't want to keep that excess, so you will want to trim as you go.  Keep your rotary cutter and a small ruler hand for quick accurate cutting.


First, flip the block to paper side up and fold back the paper that is under the excess part--you don't want to cut your paper!  The sewn seam will provide a nice fold line.


Now flip back to fabric side up and line your ruler up along the stitched seam so that you have a 1/4 inch seam allowance allowed and trim off the extra fabric.


Now fold the paper back to its original location.  Continue pressing and adding fabric until you've covered the entire 5.5 inch square.


Once your square is finished, use your straight edge ruler and rotary cutter to carefully trim off any fabric sticking out beyond the paper.  Be careful not to trim into the paper!


Move your blocks around until you find an arrangement you like.  Here are two blocks worth that I've sewn up.  You can see I've arranged one in almost a diamond shape and the other in an X shape.  I like both equally well.  You don't have to form these patterns, you could have them going any direction really.  Find what is most visually appealing with the fabrics and lines that you have.  This also lets you see the variety to the wonkiness of the fabric scrap strips.


Take your 6x13 piece of print.  You will cut two 2.5 inch strips from this.  Next, taking one strip, cut two 6 inch pieces.  (These strips are a bit longer than what you'll need.  This gives you a bit of wiggle room when sewing down the first side which can sometimes "adjust" itself on you.)


I like to lay out my blocks and strips to preview what the final block will look like.  It can get a bit crazy with all those prints, so you want something that gives interest, not eye-strain!  I went with a pink print for one set which had more Spring-like tones and a blue print for the more Summer-ish set of squares.


At this point, I often take a quick digital snapshot so that I can remember my block layout once I start picking up and sewing pieces.  This is especially helpful if you're making more than one block at a time!


You are now ready to sew on the strips.  Start with the shorter ones.  Place right sides together.  Match up the longer edge of the strip to the edge of the square.  Let the small extra length of the strip hang off both sides.  If needed, use a pin or two to hold the strip in place.  You want to line up the edges of the strip, the fabric strips and the paper square.  


Now flip the square over and stitch along the lines you drew earlier to form the 1/4 inch seam allowance.  The lines, you will find, allow you to focus on keeping the edges lined up without worrying about a consistent seam allowance which is important for best results.  You may find that you also sew a bit faster as you only need to follow the line!


Press open so that the seam allowance goes towards the strip.  This helps cut down on bulk.  Trim the strip so that the edges are now even with the square.


Repeat the process with another square and the other long edge of the short strip.  Again press the seam towards the strip.  Do this for each short strip.  You will end up with two "paired" squares like this.


The long strip is the last sewing part!  Line up the long edge on the edge of one set of paired squares.  I like to work left to right, it helps me keep things straight, but feel free to work right to left.  Let the extra length hang off each end.  I recommend using a few pins to hold the strip in place.  Flip to the paper side and sew along your lines (just like you did for the short strips).  Press seam allowance towards the strip.


Trim the long strip so that it is even with the paired squares.  This view of the back shows you all the seams at this point.  You can see how quickly the bulk would build up if you didn't press towards the strips!  Sew the second pair of squares to the other side of the strip and press towards the strip.


Your block should now look like this from the back.  I like to give the whole block a good press prior to removing the paper foundation.  I find the paper comes off easiest if I start with removing the paper in the outer edge seam allowances and then work from an outer corner towards the middle.  Fold each paper section (not the fabric) back before tearing away and then carefully tear off paper.  This is not an exercise in brute strength.  Take your time and work gently to avoid distorting your carefully made blocks or pulling stitches.  I like to work on paper removal during mindless television moments like commercials or the Oscars.  But this block is pretty quick.  Use your tweezers to snag little bits that get caught--just be careful not to snag some of the seam's thread too.  Remember, really tiny bits will wash out when the quilt is laundered at some point in the future, so don't go blind trying to get microscopic bits of paper out of tight corners!


If you were neat and careful in your cutting, trimming, pressing and seam allowances, you will probably not even need to do further squaring up.  Here are my two Vintage Liberation blocks:


I plan on joining my blocks with a 2.5 inch strip sashing with 2.5 inch squares at the meeting points.  I haven't decided if I'll use a print or a solid--I'm still having fun with blocks.  And best of all, my scrap pile is getting smaller!  Go get your scrapbag and make yourself a quilt!
Vintage Liberation Quilt BlockSocialTwist Tell-a-Friend

Squared Away Quilt Tutorial Part 3

Okay, by now, you've gone through Parts 1 and 2--cutting and sewing the blocks--and are ready to arrange them.

The first step is to lay out all your blocks alternating print and solid blocks, get them arranged into the number of rows/columns you want, mix up the prints so you have a nice layout variation.  Be sure and set all blocks the same way (so you have the little off-centered square towards the same side).  Now to rotate the blocks.  You've got four sides (I know, duh.) so leave your very first upper left corner block as is.  Take the block to the immediate right and rotate it one quarter turn clockwise.  Repeat across the row, each time rotating on quarter turn clockwise from the position of the block to its left.  Next row, begin by rotating block one quarter turn clockwise.  Then rotate the blocks down the row like you did before.  Repeat with the next row, with the first block rotating one quarter turn from the position of the block immediately above it.  Clear as mud?  Here's what it will look like:


You'll now sew the blocks together.  I like to take one row at a time, so as not to mix up my block placement.  Right sides together, stitch, press.  It's really that simple.


Here's one row, I had six blocks per row, so it made for nice even pairs sewing across.


Once you've sewn the blocks in pairs across, then start joining the pairs.  (If you had an odd number of blocks in your row, be sure and sew the "extra" block on at this point.  It's much easier than waiting to the end of a long row!)  Don't forget to press.


Keep joining sections of the row until the row is complete.  (Because I don't have a dedicated sewing room or design wall, I have to pick up my quilting sometimes.  If you're like me, then be sure and label each row so you can put them back in order later.  I use a small post-it note with the number pinned to the first block in each row.  That way I always keep the rows in order and right side up!)


Because I was using white for my solid squares, I pressed the block seams towards the printed blocks for less show through (not that there's a lot when using Kona).  This also means that for each row, the seams will be going in opposite direction from the one above and below it, so, when sewing the rows together, you should get them to abut together nice and tight making your corners all meet up nicely.  Win-win!


Once your quilt top has been completely sewn together, squared up and pressed, you are ready to quilt.  Select you backing fabric and batting, stack your quilt sandwich and baste in place.  For this quilt, I simply pin basted the layers together.  Be sure and give yourself some extra batting and backing beyond the edges of your quilt top--sometimes with a lot of quilting the batting and backing can sort of shrink on you!


Because I knew this was going to be a little girl's doll quilt, I wanted to keep the quilt very soft and flexible.  So, I kept the quilting very simple--just stitch-in-the-ditch between all the blocks.  For a larger quilt or larger blocks, you may want to quilt a bit more.


When the top is quilted, trim and bind.  Here's another look at the finished Squared Away quilt, now residing in the bedroom of a lovely 7-year-old girl in Colorado.


Another look at the quilting between the blocks.


And the back, a bit of vintage fabric my mom passed on to me that I've been hoarding for a few years.  It was good to share it finally!

Squared Away Quilt Tutorial Part 3SocialTwist Tell-a-Friend

Wednesday, March 2, 2011

Catch Up Wednesday

Okay, when my computer decided to have its little diva moment, I wasn't able to keep up on posting photos of all the quilt blocks I've been making for bees (most were even sent on time too!), so here they are.  Well most of them.  Unfortunately, I forgot to photograph the lovely shot cottons used for Sew Buzzy's January blocks--I was sent a lovely soft green and blue to work with, very nice.  I also forgot to photograph my last embroidery swap piece before it was sent off to Europe.  Sadly, this piece never arrived at its destination.  (Cry with me.)  I will however be making Susi a new piece, because its just too disappointing to not get a swap!  Fortunately, I did get the rest so you can see them. 

Not in any particular order:

A blue asterick block for January's Moody Blues Bee (Tracy) person.  She is using various blue solids for the backgrounds.  They look fabulous with the gray print centers.  Here's a link to the tutorial.


Two miniature house blocks for Jennifer (November) in the Scrap Happy group.  These will go towards a child's blanket so she can have one at grandma's house when visiting.  How fun is that?  I just made up my patterns.  Added the cat and bicyclist for a bit of whimsy.


Two railfence blocks for Jenifer (February) over in the Scrap Happy bee group.  She asked for bright and scrappy--I think I got that one in the bag!  Railfence is a great block for beginners.  Here's a link to a pattern (but really, its just strips sew together, cut in blocks and rotated--been around forever!).  Here's a example of one with more strips.  So lovely!


These snowball blocks went to Christina (November) in our Sew Buzzy group.  She sent a pattern and lots and lots of fabric for us to cut and sew--giving us the option of just a few, or if we had the desire, more.  As we currently have an MIA member (bah!), I went ahead and sewed up all the snowballs.  This is just one possible arrangement.  Here's some easy instructions for those who've never made one.


Two Square-In-Square blocks for Gwen (January) in the Scrap Happy group.  She asked for bold colors, prints or solids, and peekaboos in the centers were okay.  Here's the example image she gave us to go with.  We could do as few as one square-in-square within a block or a hundred.  I did one with four and one with nine.  Okay, so I am in desperate need of solids in my stash (sadness), but I did have plenty of fun prints including a couple of squares with these little scottie dogs.  Hope she likes them.


Two Starburst blocks for Lori (February) in Bee Scrappy.  She asked specifically for yellows, oranges and pinks.  So summery!  Where's my lemonade?  Even though this is for a scrap bee, I actually had to go buy a few fabrics--I'd cut up just about all my orange fabrics this last summer for a quilt I'm working on!  While I was there I picked up a couple of pinks and yellows too--hey, why not?  Here's the tutorial, because you know you'll want one too!


String blocks are pretty popular right now--and if you haven't tried one, you should.  Here's the instructions.  They're very easy and look great whether scrappy or all coordinated.  These four (the extras to make up for the MIA member) belong to Mika (October) in our Sew Buzzy group.  She sent almost all the fabric and asked if we'd put in some of ours and in trade keep some of hers.  I contributed the striped fabric.  It has a bit of a shimmer to it on some of its stripes that worked perfectly with the shimmery orange and pink fabric she'd sent along.  I'd been saving that fabric for a couple of years for something special--this must of been it, because it couldn't have been better matched!  In trade, I kept a small piece of Valorie Wells Sole fabric (you can see some of it in the top left block, third stripe from the bottom right corner--yum!).  It will be cool to see where these blocks end up in the quilt!


Another set of string blocks (I told you they were popular), this time for Eileen (February) of the Sew Buzzy group.  Eileen sent this lovely combination of fabrics to work with--go ahead, oh and ah!  I did extra to again make up for the MIA member (don't get me started about bee members who just stop communicating and keep fabric, grr)


Last, but certainly not least, a String-X block for Jenn (November) in the Bee Scrappy group.  I'm sorry I don't know all of the fabrics she sent, but I included some Nicey Jane for my part and so I do recognize some more of it in what Jenn sent.  This is really a striking block, not too difficult either.  Just take your time with careful cutting and sewing to line up the seams!  Try one--you can always make it into a pillow!


Whew!  That's a lot, and I still have a couple of February ones (and now March) plus one really, really late set of Harry Potter blocks (and yes, I will be sending an appropriate amount of chocolate to make up for tardiness). 
Catch Up WednesdaySocialTwist Tell-a-Friend

Saturday, January 29, 2011

Something Funny

This one, sent to me in an email, always makes me laugh.  Hope you enjoy it too. 

Something FunnySocialTwist Tell-a-Friend

Thursday, January 13, 2011

Bees for Me

Well, seems my computer hasn't let me edit photos for a bit, I can't show you my latest stuff.  However, I can show you what I'm choosing for my months in two bees. 

I have the month of January in both the Bee White Black and the Bee Scrappy groups!  So, in between sewing bee blocks for others, I've been cutting up fabric and sending out packets to others.

For the Bee White Black group, I had originally planned to do a traditional block pattern, but couldn't get the fabric I wanted for the blocks.  Searching on ebay (love that site), I came across some cool looking black and white fabric, but unfortunately, there was only a yard of it.  I bought the fabric (well, duh) anyway because it gave me a great idea for quilt blocks.

Here are some scans of the fabric:


Pretty awesome looking isn't it?  So my idea was that each member make a block that looks like one of the squares on the fabric.  I sent out a fat quarter each of white and black Kona with instructions to make one of the squares or something similar ending with an outer border of black (any width as long as the finished block ends at 12.5 inches).  I plan on sashing them altogether with more black so it will give that slightly off-centered look that all the squares have.  Already some of the blocks are done.  You can check them out as they appear at the Bee White Black group page.  I'm getting pretty excited for this quilt.  This will be my first all solid quilt.  (I'm blaming Cherri House for this, but then after you check out her City Quilts book you'll start looking at solids too!)  The coloring is simple and I think would translate well into many other color choices.  Make some up for yourself!

The block I chose for the Bee Scrappy quilting group is a wonky, scrappy block designed by Sarah Vee over at the Sew Joy called Liberated Churn Dash.  She's got a great tutorial and very generously gave permission for me to link to it for my group members to use (and for the rest of you too!).  I really like her idea of combining wonky and scrappy into an otherwise very classic traditional block.  This will be my first wonky quilt, but after making all those wonky houses and stars and such for everyone, I just had to have one for myself.  I chose to go with black and white prints and white background for this one (guess I just had black and white on the brain) which I think will give a fun look to the block.  Each member is getting an 18 inch white Kona square and few needed some black and white prints too as they didn't have quite enough in their stash.  (I know, tragic isn't it!)  You can check out the blocks as they are created on the Bee Scrappy group page.  I may have to make this block up in a colored version sometime because it is just too cute of a way to use up scraps!

I can't wait for my lovely blocks to come pouring in!  Try some of these blocks--and let me know, I'd love to see your work!

Off to the post office now--hopefully some packages are waiting! 
Bees for MeSocialTwist Tell-a-Friend

Tuesday, January 11, 2011

Squared Away Quilt Tutorial Part 2

Now that you have all your blocks cut apart and center sections swapped, you are ready to begin sewing.  You will want to press your seams open as you go, so have your iron and ironing board near your sewing machine to save yourself a lot of back and forth.  (Personally, I like to assembly line blocks like this--sew all of one set of pieces, press all, then on to the next set of pieces, etc., it's just easier to keep track of everything that way and I can have music going without worrying about distractions. )  I've included lots of photos, so hopefully no one will get lost--this really is an easy quilt to make!

Here's where we left off:


To begin sewing, take the center square and that small piece directly to the right of it and sew using a 1/4 inch seam allowance with right sides together. (By chain stitching the blocks, the sewing will move along faster, just keep track of which ones go where.)


Press each piece by setting the seam first (this is where you simply press the sewn pieces as is--without opening them up) and then pressing open.  I like to have my seams pressed towards the darker fabric, especially when working with white, but it really doesn't matter as long as you are consistent!


See how my seams are opposite between each partner block--it will help reduce bulk later and keeps the seams from showing much with the white fabric. 


Here's what it will look like with the other pieces:


Next, sew the center square section to the piece directly above it, right sides together.  I like to keep the center square section on top so that I can make sure the seam allowance doesn't get turned funny and sewn that way.  Be sure and line up the bottom and left edges of the pieces so that you'll have an even inner edge.


Sew with the same 1/4 inch seam allowance.  Again, chain stitching will keep things moving right along.


Press as before, with seam allowances towards the darker fabric.  You can see how this piece sticks out beyond the center section, don't worry about it, that extra will be trimmed off later.


Now repeat these steps with the piece directly below the center square section.  Line the pieces up so that the top and left edges are even--you want the inner edge to be straight and even for attaching to the last piece.


Sew and press open, so that you're pieces look like this:


Here's a quick peek at the backs, so that you can see how I've pressed the seam allowances:


You are now ready to attach the final piece of each block. 


Flip the center square section over on to the left side piece, right sides together.  Line them up so that the top and right edges are even.  (Sorry my photo is sideways, the top of the image is the left.)


Sew and press as with the other pieces.  You will now have blocks resembling the letter "F".


Using a ruler and rotary cutter, trim off the parts that stick out from the main block--you're in the process of squaring the block, so try to straighten the edges so that the center square piece looks like it is straight and not tilted. 


Square up the rest of your block by trimming away any excess or uneven sides.


Now, square up each of your individual blocks to the same size.


Once all of your blocks are sewn and squared up, you are ready to begin laying out the quilt--that will be in Part 3!
Squared Away Quilt Tutorial Part 2SocialTwist Tell-a-Friend

Saturday, December 11, 2010

Trim the Tree Handmade Ornament Swap

Here's a look at the three ornaments I sent out for this year's Trim the Tree swap.  One is still on it's way--it has a long way to go--but the other two are happily in their new homes!  Each is based upon that partner's favorites in Flickr and their inspiration collage, so each is very different from the others.  I like that, keeps it interesting.


Made with homespun, quilter's cotton, some vintage ivory satin piping, three vintage buttons and some simple applique, this little house ornament is my own design.  You can make one easily too.  Just cut two rectangles for the house, two triangles for the roof, one rectangle with fusible for the window and one for the door (I rounded the top of my door and fussy cut so the flower works for a doorknob.).  Fuse the window and door to one of the house rectangles and applique with a straight stitch for outlining.  Next sew one roof to one house and then repeat for the other (if you're adding a trim, simply sandwich it in the layers and sew).  Now attach a ribbon or, like I did, a sewn muslin loop, to the top of one roof for the ornament to hang from.  Next, sew the two layers together, being careful to tuck the loop inside and not catch it in the sewing, leaving a few inches on the side for turning and stuffing.  Turn, stuff to desired fullness, and stitch the side closed (I used a ladder stitch, but any non-visible type closure stitch would work fine.)  Done!  For this one, I made a small loop and included one of those metal ornament hooks, but you could make a larger loop to go over the branch of the tree.  Easy peasy.


For this partner, I decided to make a bird--specifically a dove.  So I used two different tone-on-tone white fabrics for the body and some white satin ribbon for a long loop.  I also cut a simple leaf from some green felt which I sewed to the beak at the end.  The ribbon is also handsewn to the top.  For a pattern I used this fabulous one from Spool Sewing.  The pattern is very simple with very pleasing results.  Definitely one to try!


This final ornament is made entirely of felt.  I was going for a retro handmade ornament look and the red, lime (I know, I know, the photo shows a different shade of green--the camera lies!) and white is the combo for retro Christmas.  The white and green layers are attached using embroidery floss in a blanket stitch.  I used this fun reindeer pattern, added to the Hoop Love Vintage Transfer Flickr group by Doe-c-Doe, to create the siloheutte seen--warning, all those curves on the antlers involves a lot of handstitching, not hard, just a lot.  I then cut the green and red pieces to outline the reindeer in a larger less detailed shape.  I also added a 1/4 inch seam allowance to the red as I machine sewed the red layers.  I used some white satin ribbon for the loop.  This one is not hard, but does involve some handstitching.

I hope you make at least one handmade ornament this year--and have lots of fun!
Trim the Tree Handmade Ornament SwapSocialTwist Tell-a-Friend
Related Posts Plugin for WordPress, Blogger...